Syphon! Virtual! Webcam!
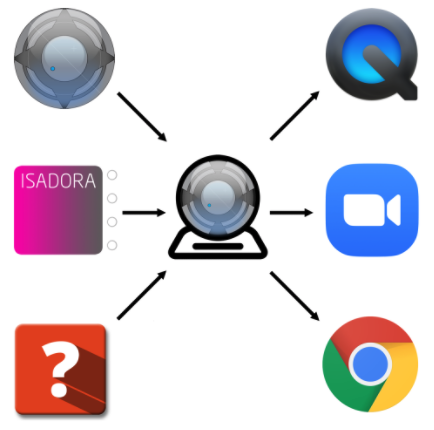
Welcome to another mini resource! This short tutorial is for the usage of the Troikatronix application, Syphon Virtual Webcam.
There a few ways that you can learn!
You can watch the experts do it on the Troikatronix YouTube Channel.
or
You can follow through with my screenshots and process using OSX.
or
Utilise the wealth of resources also available online!
This is not an Isadora plugin, it is simply developed by Troikatronix, the organisation that builds and operates Isadora. This application is only available for Mac OS users, currently. Different versions of operating systems may also cause various changes and issues.
The simple first step, is to download the plugin from the Troikatronix website.
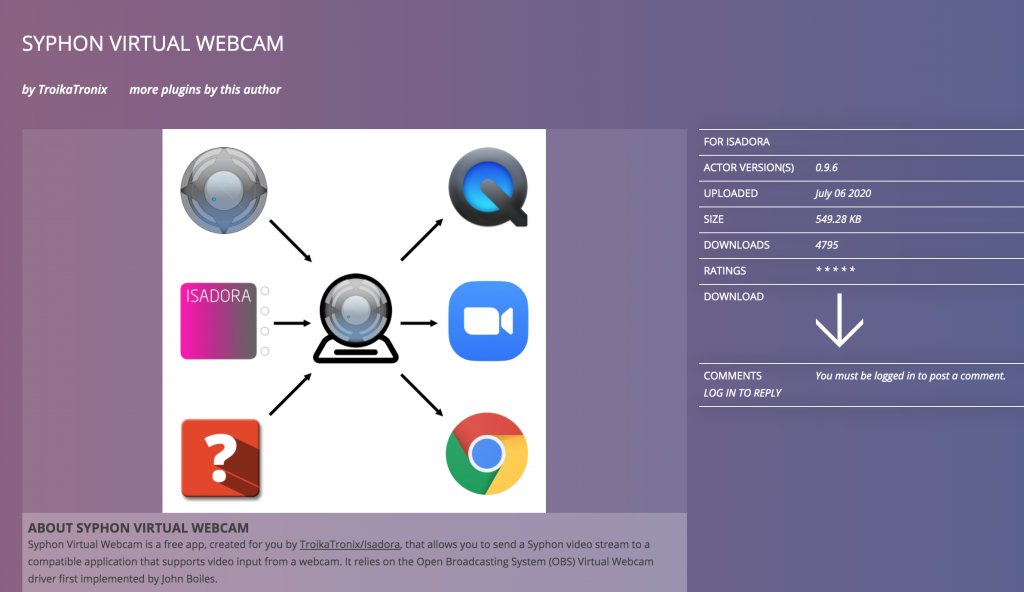
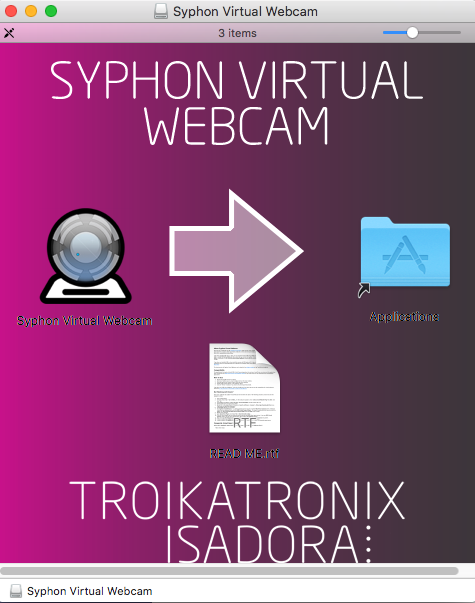
The file you will then unzip, is a .dmg file. Double click the .dmg file. Follow the prompts that are kindly provided by the installer.
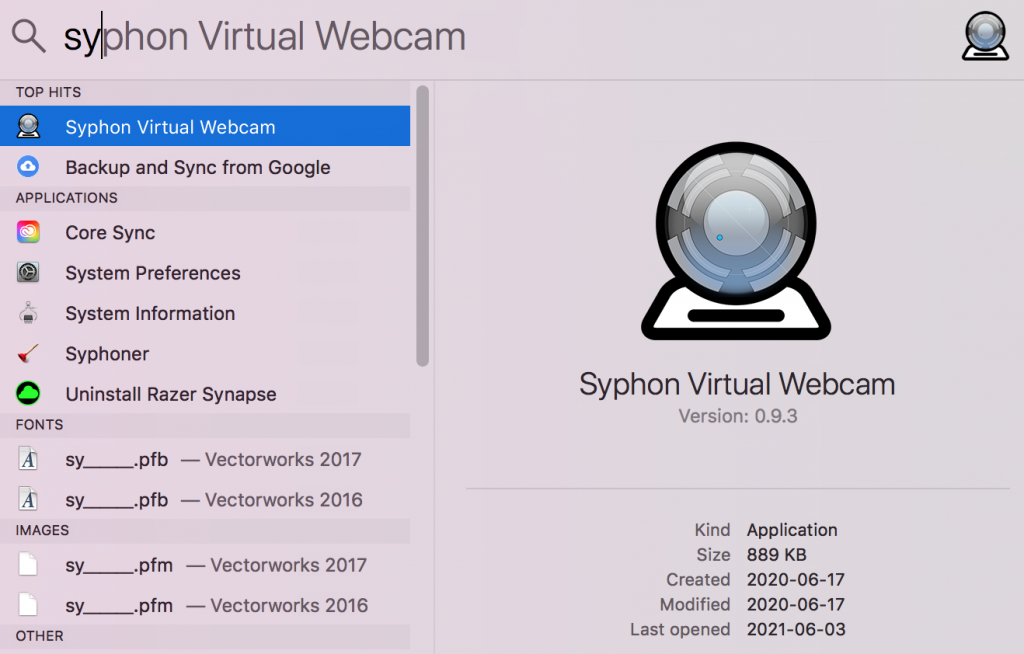
Once the installation is complete, search your applications and double click to launch!
The window that will open looks like this:
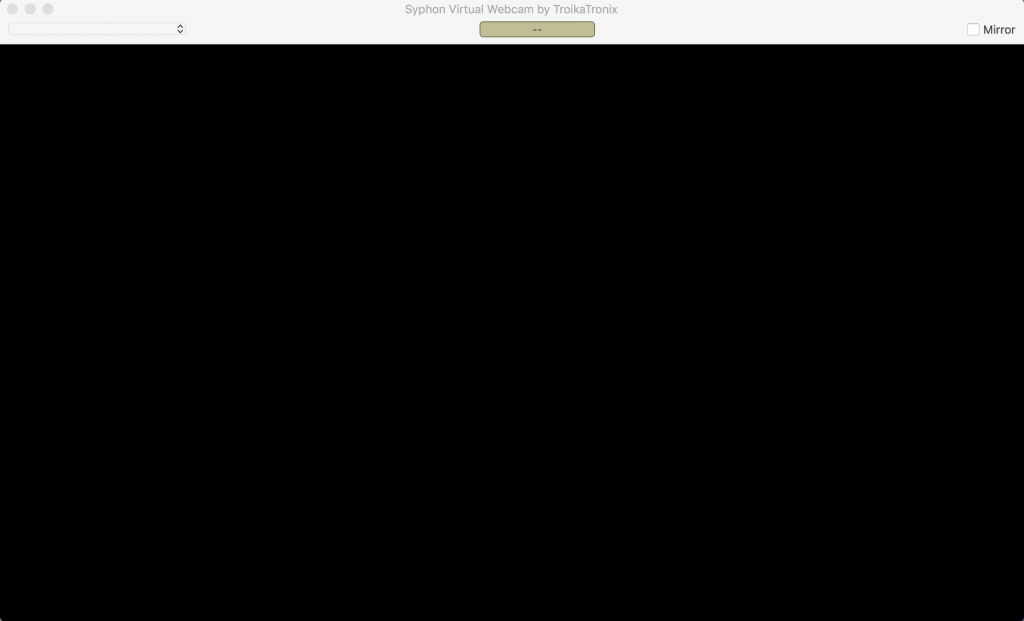
Now, we need to give it something to broadcast! If you haven’t already done so, check out my tutorial for Isadora for live streaming to learn how to create some basic playback and connection templates.
As if we were about to output to OBS or another live streaming tool, we will be using a Syphon output. I am using Isadora in this example, but any app that allows for a Syphon video output should be compatible with this app.
Here is a small example patch:
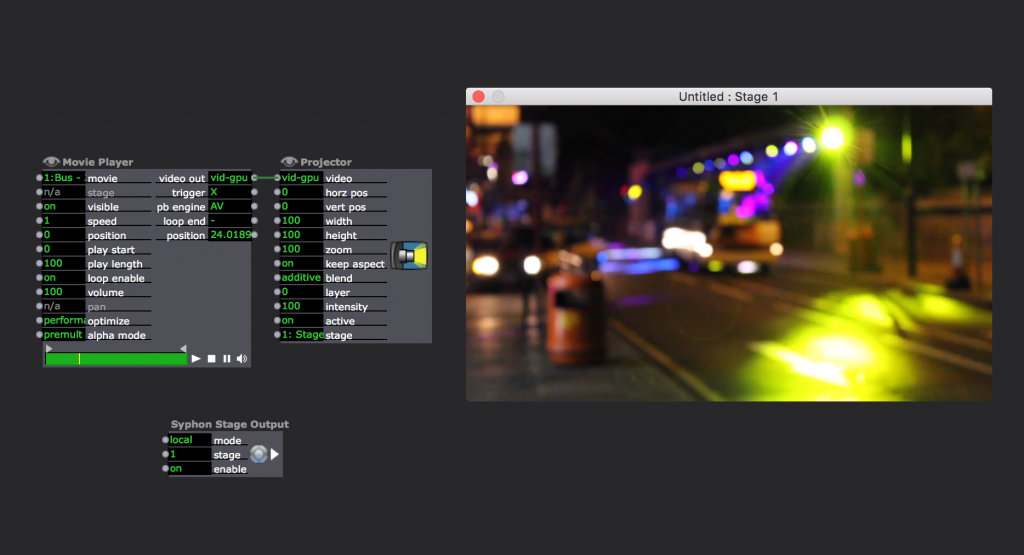
Syphon Stage Output is now taking the media that I am playing on “Stage 1” and sending it out to any Syphon compatible application that will take it. Now, if you check your Syphon Virtual Webcam window, set the source to “Stage 1 – Isadora”, or your respective output source, and a realtime, full-sized version of this video will now be on your webcam preview!

Next, we’ll need to find a place to send our media. The beautiful thing about this tool is that it allows you to choose the video you’re sending at any time to a video conferencing software, as well as just any regular webcam input!
I am now going to visit my video conferencing application of choice: Jitsi.Meet, and begin sending my own video:
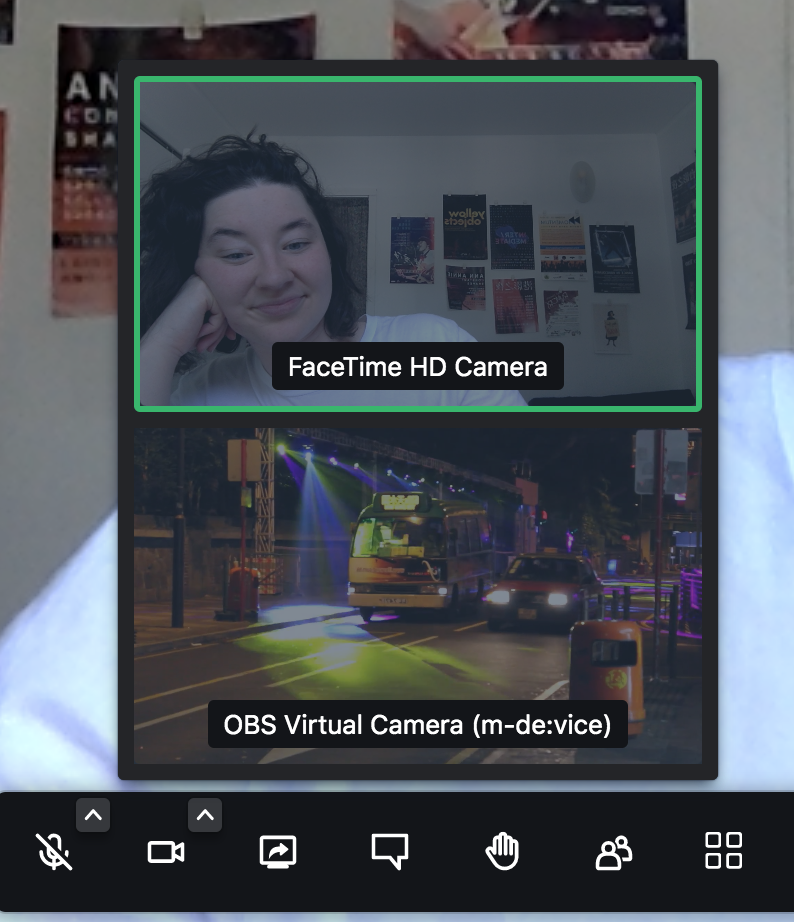
OBS Virtual Camera should appear as an option right away! If it does not, try the following steps:
- Refresh your browser
- Try a different browser (Firefox, Chrome)
- Try another video conferencing platform (Whereby, Cisco Webex, Google Meet)
- Utilise the troubleshooting and compatibility resources on the Syphon Virtual Webcam GitHub
Now that it’s working, select the OBS Virtual Camera, and enjoy your new input! If you are experiencing severe lag, try:
- Hardwiring your internet connection
- Restarting your computer
- Try a different browser
- Close some tabs
- Wait for it to work itself out (this works surprisingly well)
Now, you have the freedom to send anything you want into video conferencing room. This can help you in bypassing buggy screen sharing integrations, fake your own presence at a meeting, or provide accessibility or administrative information during an event.
Thanks always to my mentors: Sammy Chien, Milton Lim, Remy Siu, Mark Coniglio
Installing Isadora Plug-Ins
Installing plugins
As a new user of Isadora, you will quickly find that the community is an amazingly welcoming and warm place. This shows itself in many ways, including in this incredible add-ons page, where you can discover plugins made both by the Isadora development team, and users around the world. I will recommend that you install just a few plugins, specifically for those hoping to use Isadora for online arts and performance.
This part is a little bit complicated. Let’s download and install two Isadora actor plugins.
Download and install:
Once you open the .zip folders, this will appear:
The “READ ME” file has some helpful instructions too.
Click into your respective OS folder. Don’t worry about the .scpt file, we’ll do it in a simpler way.
Open Isadora, and locate your toolbar!
Roll over the “Help” option and locate the “Open Plugins Folder” option
Select “Troikatronix Actor Plugins”
Now, simply drag the .izzyplug into the highlighted folder
If you’re on PC, you’ll need to check which file you need to bring over. Please consult the “READ ME” inside the plugin folder!
Once the file is in your plugin folder, you’ll need to quit and restart Isadora.
The plugin should now be available in your scene editor. Please check by double clicking in your scene editor (that’s the big empty grey space), and type the plugin name and see if it appears!
Now, repeat the process with the second plugin!
Isadora: live stream design for everyone
Isadora: the creativity server is a software that was created by Mark Coniglio, founder of Troika Ranch and Troikatronix. The Troikatronix team now spans across continents, with its main operations running out of Berlin, Germany.
Isadora is named for contemporary and modern dancer Angela Isadora Duncan (1877-1927), at one time known as “The Mother of Dance”, who was born in San Francisco but lived out the majority of her career and life in various cities in Europe and the Soviet Union. After her tragic death at age 50, her dance techniques and teachings were compiled and later taught by her adopted daughters.
The first line of code for Isadora was written by Mark Coniglio in the year 1999, and was released in 2000, meant to fill a gap in the creative technology sector, specifically created for integration with live contemporary dance work. The Troikatronix community has grown en masse across the world and through countless disciplines since then. It’s accessible and user-friendly interface has made creative technology available to so many different kinds of people in it’s time. It gave me the agency to creative my own live video work, and the freedom to work in a way that I could understand.
I would consider myself partial to Isadora because I am utterly enamoured with the community who uses it. The forum is incredibly supportive, it’s staff are incredibly wholesome and eager to teach and help, and I am so thrilled when I meet people who want to learn. So, let’s do it!
Isadora is a tool that has unlimited capacity and possibility for creation across a wide range of applications. This is my way of saying that you can do absolutely anything with it. Today, we are simply going to walk through a very basic live stream setup, so you can make your own seamless and beautiful live streamed event.

Our first step is to download the software onto your computer. Isadora is cross platform compatible, meaning that it is made for both Mac and PC. There is no Linux compatible version of Isadora.
To download the software, visit the Troikatronix website!
You may have Isadora downloaded on your computer already, and that’s awesome! But the first thing you’ll want to check out before using this guide is which version of the software you have!
This guide will be using images from version 3.0.8f12. This most recent update features a new sound routing feature that I encourage you to take advantage of.
I am hoping to share what I’ve learned from 5 years in using the software, specifically how I have utilised Isadora as my primary tool for creating and executing live streamed virtual events throughout 2020-2021. I am not an expert in the software, and I implore you to visit the Troikatronix YouTube Channel for resources from the very very essentials, to the most advanced and philosophical applications of the software.
But here’s what we’ll do.
Build your first scene!
Open your freshly installed software, welcome to the Scene Editor!
Import the media you’d like to share with the world, simply by dragging the file(s), into the media bin. It’ll help you out by sorting it into it’s appropriate spot.
Play your media, either by dragging the media into the Scene Editor or by adding a “Movie Player” and a “Projector” Actor, you can start playing your media right away. Open your “Stage” by selecting “Output” in your toolbar and clicking “Force Stage Preview”.
To send sound to OBS, you’ll want to use the new sound routing feature in Isadora. This feature is hidden at the bottom of the Scene Editor. Find six white dots, grab and drag upwards:


The device you select is up to you. To send to OBS, I use a virtual audio routing system called Blackhole.
Introduce your work!
Let’s set up a super sleek and simple way to live capture your own video to introduce your work.
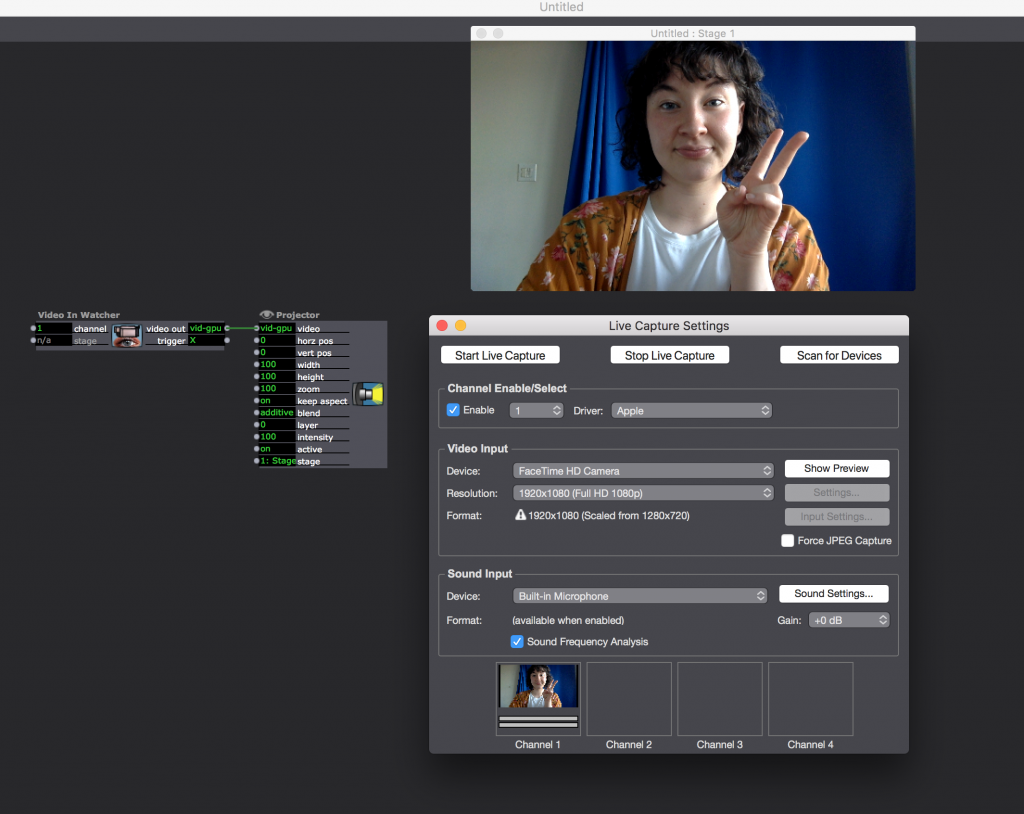
Referencing the above image, add a new scene, by rolling over your toolbar to “Scene”, and “Insert Scene”. You can also find your respective shortcut there for future reference!
This new scene will be for your introduction. You can slide it over to the “beginning” of your show by holding your mouse down and dragging it to where you want to go. Add a few more to practice!

Once your patch looks like mine, start your webcam (or other device) live capture by accessing the “Input” tab on your toolbar, and selecting “Live Capture Settings”. The above window should appear, and you will be able to scan for your device, select it, and hit “Start Live Capture”. Your face should appear! I like to handle local sound directly in OBS, so we don’t need to worry about this yet!
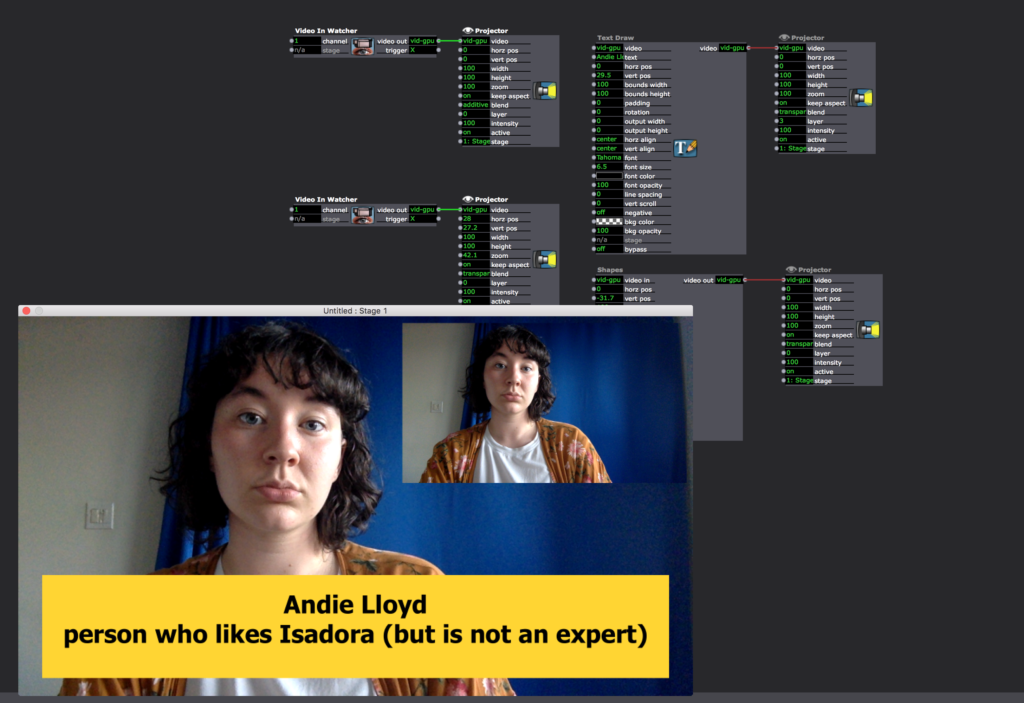
Now, you can be free to build this scene to your taste. In my example below, I have used the Text Draw and Shapes Actors to create a descriptive name card for myself. You can also see that I have added an additional input, in the event that I had an ASL interpreter with me in the space. Don’t be intimidated by the size and complexity of these actors! You only need to use the tools you want, to change the facets and things that you care to configure. Play around with these tools to get familiar with how they work, and use the undo function if something goes wrong!
Connect your collaborators!
Whichever video conferencing platform you like to use, this method will work for you. I like to use Jitsi Meet, a free and open-source platform that supports unlimited participants, screen sharing and some app integrations like YouTube. This step will require the use of a plug-in from the Isadora website. Please follow this guide on how to download a plug-in from Isadora. Once you’ve downloaded the Screen Capture plug-in, save & restart!
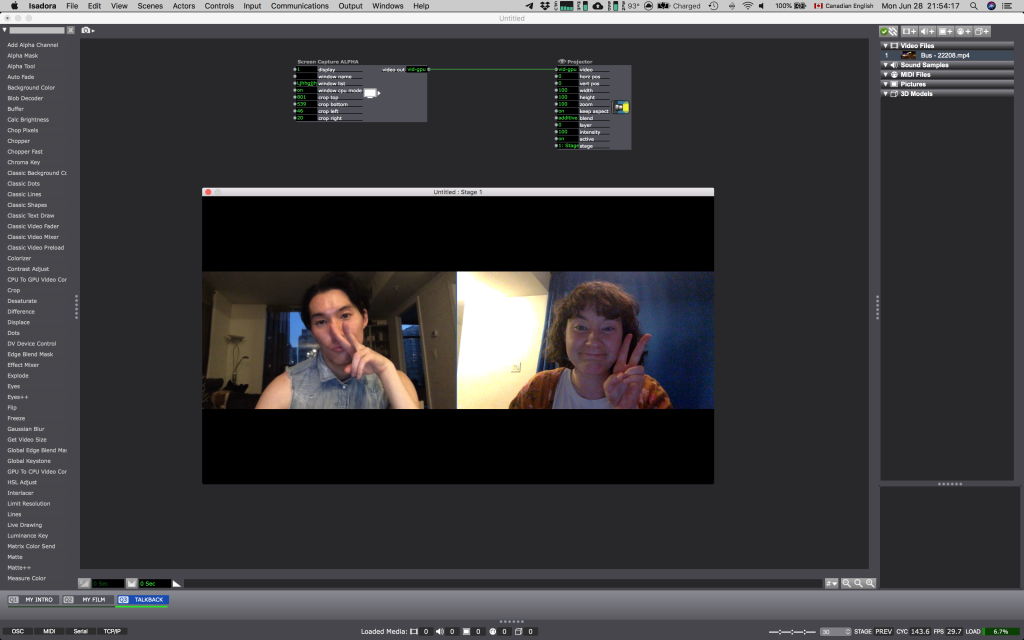
In the Screen Capture actor, you’ll find options to select your window. There are a few ways to do this, but it is super simple to select your meeting room. If you’re using only one screen, you’ll need to toggle on “window CPU mode”. This will allow your selected window to be visible at all times, even if you have something covering it on your screen. Once you’ve connected the screen capture to your conference, utilise the crop tools inside of the Screen Capture Actor. This crop allows you to easily crop and rescale your image without losing resolution. Play with it until you’re happy, and then feel free to use the Projector to move that image around. Repeat this process until you’re happy with the configuration!
Stream your event!
Now that you’ve built your event in full, it’s now time to share the work! The very last step before your streaming platform is to ensure that all of your scenes are able to send out to something called “Syphon”, or “Spout”. To do this, we simply need to add a little actor to each scene: Syphon Stage Output/Spout Stage Output.
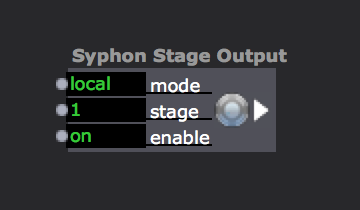
Once this is in every scene, OBS will be able to receive this signal as a “Syphon Client” or “Spout Client”. Simply add this as a video source. You’ll be able to learn about this process through one of our OBS tutorials: OBS 101 and OBS Sources.
Enjoy your event and limitless design capabilities!
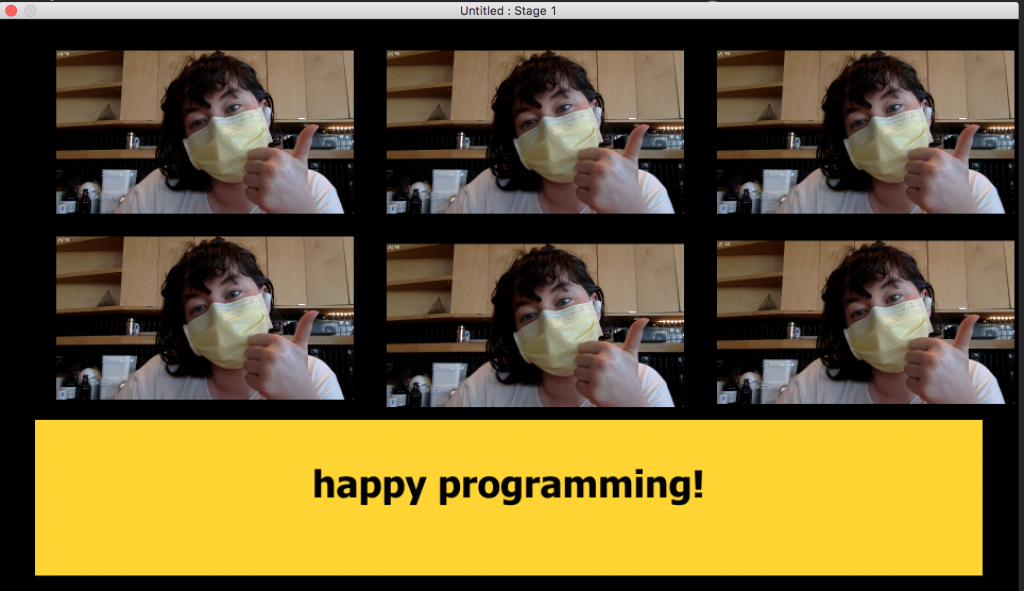
Read my guide to Syphon Virtual Webcam for a brief introduction on sending your Isadora creations into video conferencing software.
Ethical Interfaces: an introduction to the world of small software
What is open source? What is “small software”?
“‘Open source” is a term that originally referred to open source software (OSS). Open source software is code that is, in many cases, designed to be publicly accessible—anyone can see, modify, and distribute the code as they see fit.”
That’s what “open source” means. It generally also implies that the interface, the program or application is free for use by anyone. Users can donate to developers if they wish to do so. Free doesn’t always = accessible, but in the world of digital media, especially in creative industries, open source programs often allow creators a lot more freedom to experiment, contribute and enjoy the possibilities of a given software.
What I mean when I say “small software” is a software that meets a few of my own requirements:
- The software is usually created by/for users with a vested interest in the tools being developed.
- The software is priced at an accessible, and reasonable price for those who will benefit most from it.
- The developers are available to contact and open/amenable to suggestions, and committed to user-guided improvements.
- The software has a friendly and welcoming forum or community space where users can ask questions, share their work or resources.
Why open source? Why small software?
As a full-time artist AND a full-time activist, nothing makes me more proud than hosting a successful digital event with totally rad artists, using secure & open source platforms, created using software made by kind and wonderful developers.
I take immense pride in my commitment to protecting the digital and intellectual safety of my entire collaboration team on any given project. In my short career, I have been able to determine that the benefits of committing to working with ethical interfaces often outweigh the challenges presented by the troubleshooting processes that can sometimes inhibit or lengthen a creative process. This is not to say that problems are only present in open source applications or that large corporations offer flawless products that are more reliable.
But if given the choice, wouldn’t you rather feel good about what digital spaces you and your audience are creating and participating in? Digital safety is a frequently overlooked aspect of the creation process.
Creating digital works can and should be easily accessible to any person who wants to make them. The world of digital events is vast, and every person you speak to will have their own solution for any given problem you run into.
A large part of my practice is ensuring that my process and the tools I use are in alignment with my virtues as a human and an artist. I’d like to share some resources that I value in my work with digital creation, online security, and supporting ethical small businesses. All resources are cross platform unless otherwise noted:
Isadora: the creativity server [affordable, small software]
I’m biased because the developers at Isadora charmed me when I was young and impressionable. Since the beginning of my learning journey with Isadora, I have always felt unconditionally supported by the developers and the community on the Troikatronix forum.
While it is not free, nor open source, I sleep better at night knowing that my $30/month license fee is helping these artists do the hard work that allows me to more easily and freely create my art. There are a wealth of tutorials and deep dives by the creators and staff at Troikatronix available on their YouTube!
Jitsi.meet [open source, free]
I find myself using Jitsi more and more the further we dive into this collective digital world. What I appreciate about Jitsi is it’s unhinged versatility. It is free, open source, it allows for unlimited participants, HD video, locking meetings, YouTube integrations, screen sharing, end-to-end encryption for some users, and call-ins. There are other features that I would encourage you to look into during your next virtual meeting.
Jitsi is constantly in development, and therefore is not always 100% reliable. The vast majority of issues can be fixed with a browser switch or a quick refresh or permissions check. Things sometimes just don’t work, no matter what you do.
Existential Audio: Blackhole Virtual Audio Routing [free, MAC ONLY]
Existential Audio offers a free download of their virtual audio routing plugin with a quick email signup. It’s a simple way to redirect the sound coming from your video conference directly into a stream or recording interface. This is how I most frequently use it. It is widely compatible, and while it has no GUI (graphical user interface), it requires almost no setup and is fairly reliable.
VOICEMEETER [by donation, PC ONLY]
This Windows alternative for virtual audio routing features a wider array of settings, mixing and routing options, all for the price of a donation as low as $1! Many PC users in the digital arts world swear by this platform and, for such a reasonable price, it is certainly worth testing.
OBS stands for open broadcasting software. It is a collaborative project designed for livestreamers, and is super super simple to setup and use across all platforms (even Linux!). Whether you’re livestreaming, recording or sending your creation back into your video conference, OBS is the very last step.
It offers robust configuration options for livestreams (bitrate, latency, optimization for different platforms), and recording (size, location, reliable stream capturing).
Why go to all this effort?
My dedication to this ideology stems from my involvement in grassroots activism, where security, digital safety and anonymity are imperative for the efficacy of our campaigns and demonstrations. I have found that extending this learned culture of safe usage of digital interfaces into my artistic practice has helped myself and my collaborators to be free of self-censorship and have a better understanding of what our presence in digital spaces actually means in a greater socio-political context.
How does this work in practice?
Aside from utilising the tools suggested above, I have worked on creating “security briefings” for certain productions to help keep all artists safe.
One example is from a production that dealt with the sensitive themes around the Hong Kong pro-democracy movement, and in the interest of protecting all artists, we prepared pseudonyms and some protocol:
team security briefing
names, crediting, pseudonyms
Most of the team has opted to be credited under a different name for this production. This means that these team members want to keep their involvement in this piece out of the public eye. This means we’ll need to avoid using their real names in situations like:
- Discussing the piece with friends, family, colleagues
- Speaking to the media in interviews and appearances in promoting the piece
- In public promotional and print materials for yellow objects on all platforms where the show is being represented
- Other situations at the requests of each artist respectively
Everyone is currently comfortable using real names/emails/phone numbers within the circle of the production!
awareness of the situation & nsl safety
You can follow Alliance Canada-Hong Kong for updates on the Canada-Hong Kong advocacy front.
If you have plans to travel to Hong Kong or China, please familiarise yourself with the terms of the National Security Law’s border defying policies and plan to protect yourself accordingly.
secure storage of information & secure communication
I made a little info package for the safe usage of Telegram. Just a reminder that conversations are not encrypted by default (you must use the secret chat function), and that the desktop app version is not considered secure.
We are in the process of moving the personal information of the team off of the cloud and onto encrypted harddrives, as an extra precaution to protect addresses & SINs from any potential attacks.
onsite safety for team & participants
The Venue has a sophisticated and secure registration system that will ensure that all attendees are registered and issued a ticket. It is of course, not out of the question that we may encounter folks with the intention to disturb or interrupt our event. Try not to let anyone take your photo! If a situation does arise, staff will be onsite to assist and de-escalate.
tankie update
Be aware of sketchy follows/friend requests/likes on your social media and messengers. If someone like this engages you on social media about Hong Kong, this show, or your involvement in the community, do not reply. Block. Report.
Folks on the margins of the activism communities have been increasingly targeted in recent weeks, thanks to the massive waves of hate, threats, physical and verbal attacks that we’ve seen against more prominent activists in Canada.
No one is immune, really. Social engineering makes it really simple for people to see who we work with, what our work is and who we support.
Be careful, report anything suspicious to the team, and be aware that you’re not imagining things. It’s actually scary out there.
Let me know if you’d like more resources/info on this recent wave of suppression against Canadian HKers & their supporters.
In conclusion, I want to provide you with a few further resources if you are interested in further understanding my approach:
The Dramaturgy of Online Security by Davey Samuel Calderon
U.S. lawmakers ask Zoom to clarify China ties after it suspends accounts
Platform pros/cons by Andie Lloyd & Anthony Lee
Artist Disclaimer
Andie is a contractor with FOLDA and a co-digital technologist at Progress Lab 1422. An interdisciplinary artist coming from varying backgrounds in theatre, film, music, writing and more, they are committed to sourcing and researching the possibilities of accessible, professional and ethical methods of presenting digital & remote work.
As an artist who works with technology as their primary voice for artistic expression, they are often up against tech industry monoliths that often represent the very same systems of oppression that our work and the work we support seeks to dismantle. It is not a simple task to source and create a functional digital performance without years of experience and expertise in live A/V production. We acknowledge and understand that this access barrier is often what prevents us from presenting professional quality work.
I am interested not only in what is going to support your work technologically, but also ethically. I am interested in exploring open source, secure, small business, queer & BIPOC owned apps, APIs and platforms. When we can’t use these, it is important that we share the impact that platforms have on our global socio-political landscape and beyond.
I am new to this world too, and am trying, failing and learning everyday.
If you’re interested in discussing this aspect of my work in more detail, please reach out: digital@c-space.ca